Cloud and Self-Hosting
A Comprehensive Guide to Installing and Configuring MAAS on Ubuntu
By Amjid Ali · · Updated · 3 min read
Prefer to watch? This video walks through it step by step. Prefer to read? The full guide is below.
Metal as a Service (MAAS) is a powerful tool that simplifies the management of physical servers, allowing for efficient deployment and scaling of infrastructure. In this tutorial, we will guide you through the process of installing MAAS on Ubuntu, covering essential steps;
Get your Ubuntu Server Ready
Step 1 : Install Pacakge :
Once the server is ready access the server using SSH and update the package and install the upgrade and reboot.
sudo apt update
Now let us ensure to update the packages, use the below command to upgrade the available packages
sudo apt dist-upgrade
Let us now ensure that all the required packages are upgraded, to do this let us reboot the server
sudo reboot
Step 2 : Install maas on Ubuntu :
Let us now install maas version 3.4 which is current right now , we will use snap to isntall maas.
sudo snap install --channel=3.4 maas
Now maas is installed but you need to ensure to disable the timesynced service to avoid conflict with maas.
sudo systemctl disable --now systemd-timesyncd
If you are testing it you can use testdb to test maas, but for a production environment, you will need to install the databse server. Move to step3.
Step 3 : Install and configure Postgres Database Server
We will setup for the production environment you will need to install Postgres database, use the following command to install the latest version.
sudo apt install -y postgresql
If the database is successfully install you will need to reboot the server
sudo reboot
Step 4 : Create Database Server user, password and then database. In my example I am using “maas” as user “maaspass” as password, you can chose the user and password of your choice
sudo -i -u postgres psql -c "CREATE USER \"maas\" WITH ENCRYPTED PASSWORD 'maaspass'"
Now the user and password is created, let us now create the database for the user ‘maas’, my database name is “maasdb”
sudo -i -u postgres createdb -O "maas" "maasdb"
Now the database is successfuly created at above step, you need to edit the configuration of the databse by using below command
sudo nano /etc/postgresql/14/main/pg_hba.conf
add below lines at the end of the configuration in the existing configuration of the above file
host maasdb maas 0/0 md5
the configuration file at the end will look live below
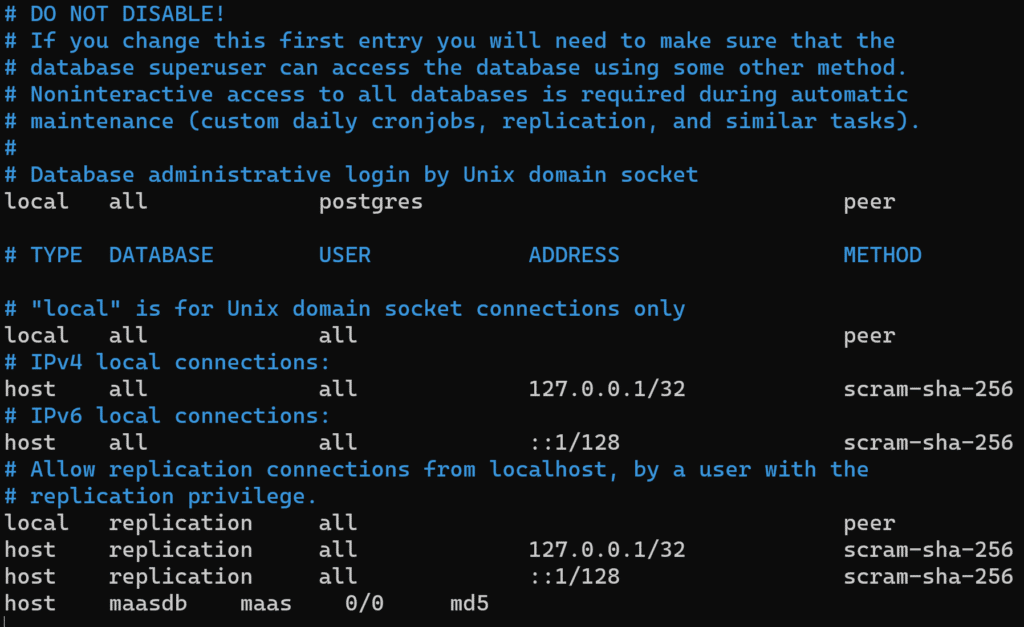
Now exit the file and save it.
Step 5 : Initialize maas
Now it will get installed, once the maas is installed you need to initialize with the databse name, host name . Suppose if you have used above database configuration you will use below command to initilize maas;
sudo maas init region+rack --database-uri "postgres://maas:maaspass@localhost/maasdb"
In above command maas is user and maaspass is password for localhost as database server and maasdb is database.
Congratulations, maas is now initialized. Now you need to setup the admin password.
Step 6 : Setup admin credentials for maas
You will need to use below command to setup admin password;
sudo maas createadmin
user required details to setup the credentials i used below
Usernam : amjid
Password : syncbricks
Again : syncbricks
Email : amjid@syncbricks.com
Import SSH Keys
Congratulations your maas is ready now you can login
Login to MAAS using Web Browser
Now maas is installed and it will be running at port 5240, in my case the Server IP is 192.168.240.1 so below was URL in my case
http://192.168.240.7:5240/MAAS
Enter User and Password which wet setup initially. Now you must do some configuration
Connectivity configuration and Ubuntu Archive. Chose Ready images that can be used for installation.
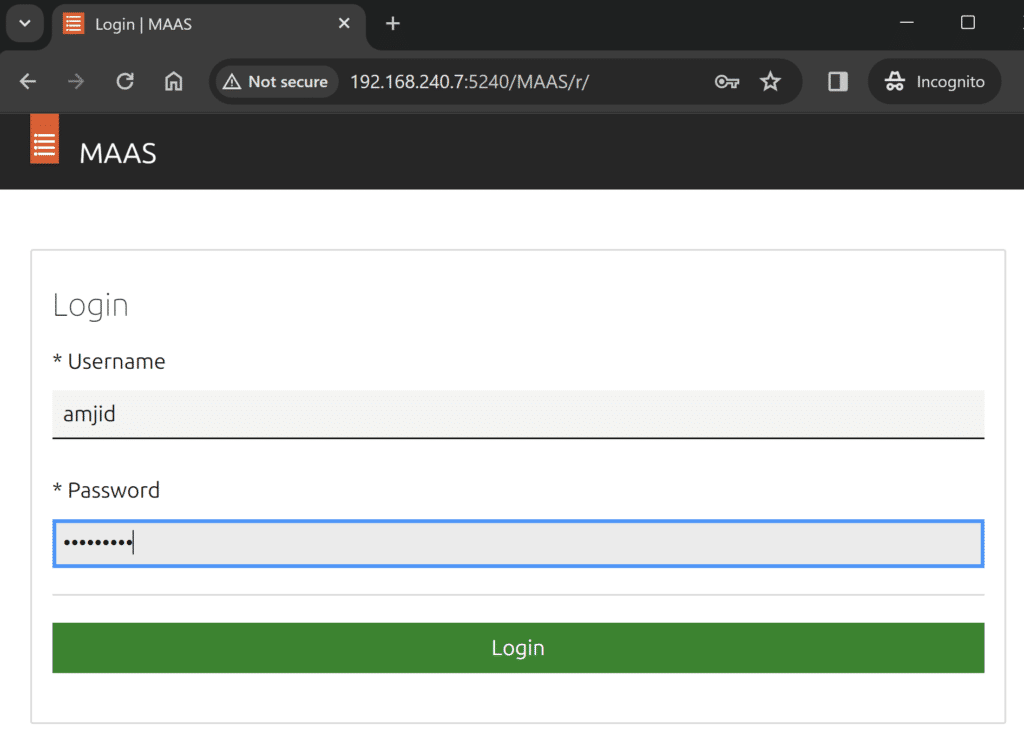
Congiure maas
Now configure maas to your specific needs.
Related videos
Video library- Cloud and Self-Hosting
MAAS Install Guide: Deploy Bare-Metal Servers Like a Cloud
· 17:50 · 11.5K views
Watch on YouTube
Keep reading
 Cloud and Self-HostingList of Best Server Virtualization Software in ItalyA list of the best server virtualization software options for enterprises in Italy, compared on architecture, licensing, and security. · 5 min read
 Cloud and Self-HostingWhen Free Stops Being Free: Understanding Cloud Storage for Business Usesource · 3 min read
 Cloud and Self-HostingExchange Server Database won’t Mount after Dirty Shutdown? Here’s How ESEUTIL can HelpExchange admins sometimes face a situation where the database does not come online or fails to mount itself. There are a number of things that could cause · 5 min read